Agriculture today is about so much more than a farmer simply planting a seed.
It takes a whole ecosystem and a host of actors to work together to produce the food we need for a population
of more than seven billion people. This complex agricultural production system has evolved over time through
scientific discoveries and other innovations. Advances in technology and farming practices have helped farmers
become much more productive, growing crops efficiently in areas most suitable for agricultural production.
So I have designed a product to nurture the common needs of farmers.
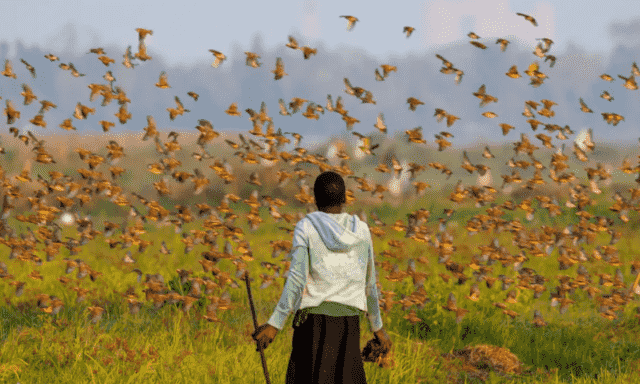
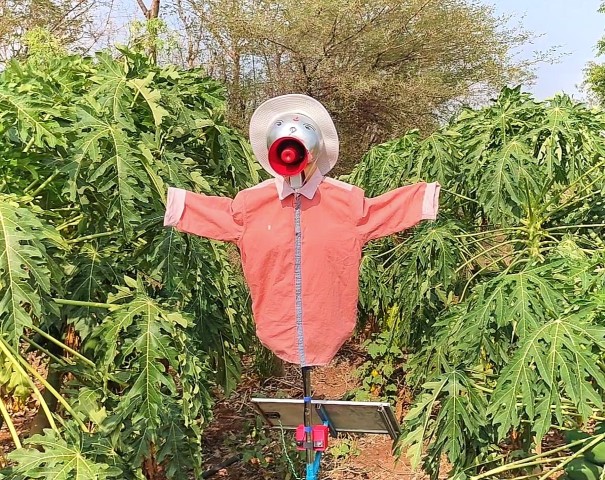
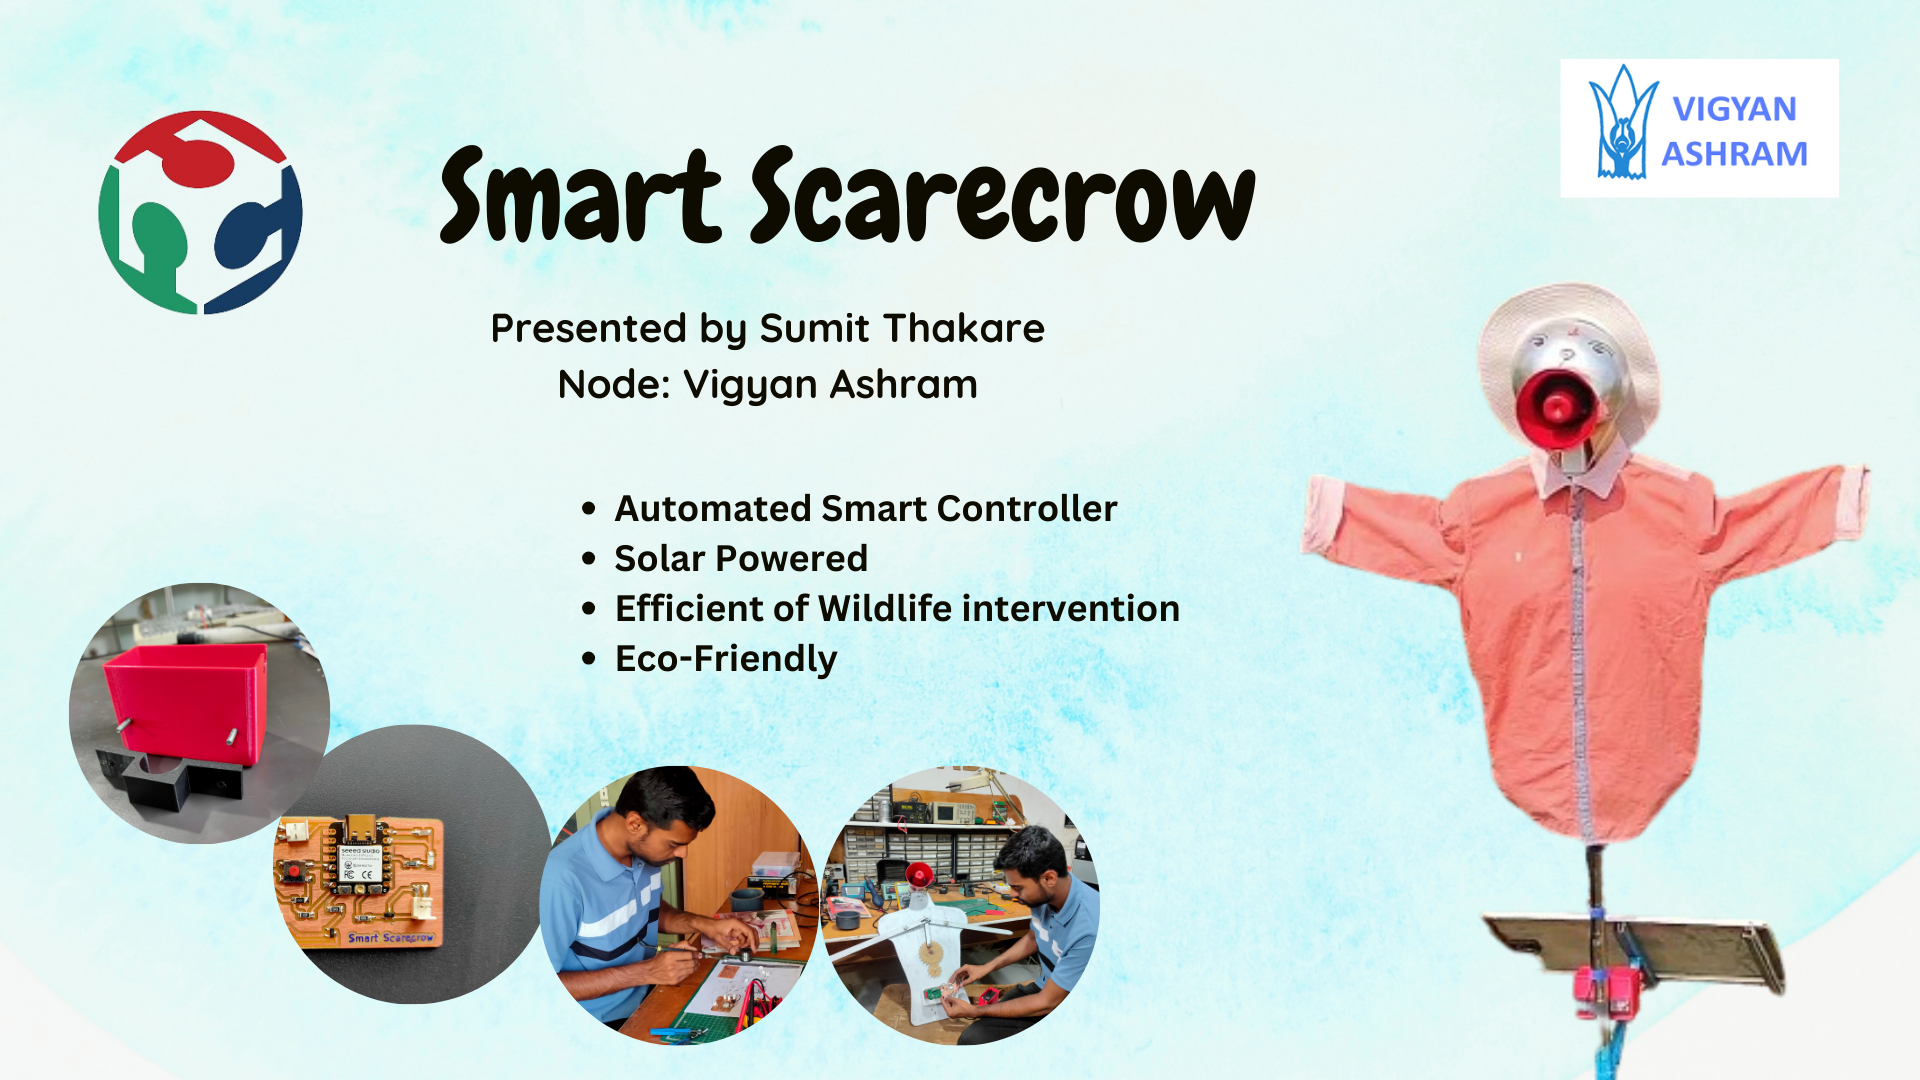
My Project is Smart Scare Crow for protection of crops from Birds and Wild Animals.
Source of Motivation
Problem Statement
Traditional scarecrow being a low cost model is widely is used by farmer, but it has less effect because birds after some time get used to it
and they don’t have fear any more, and even in the nights when wild animals enter the field they don’t matters a standing mannequin till its make some scaring sound.
Also when discussing with farmers about their problem related with farming we know that most of the open farm fields farmers are having threat of Wild Animals being destroying their crop,
and its very difficult and costly to keep a labor in farms for this work.
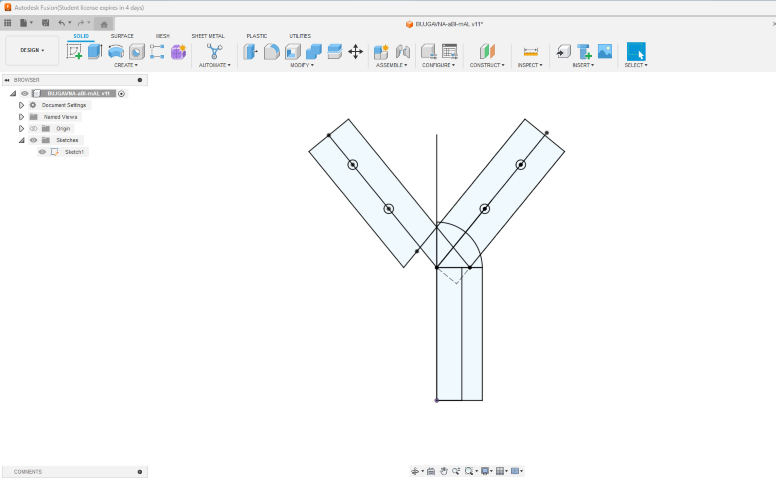
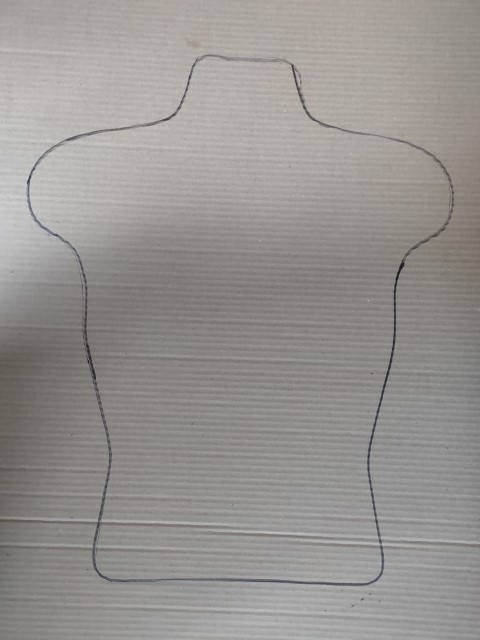
Project Sketch
Bill of Material
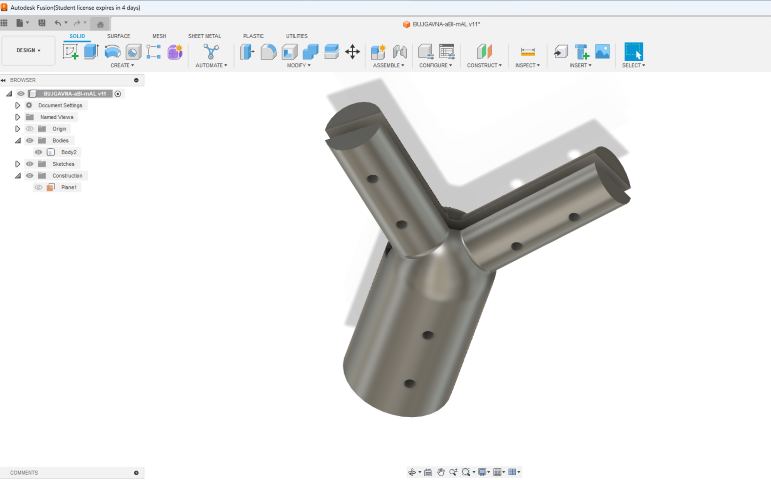
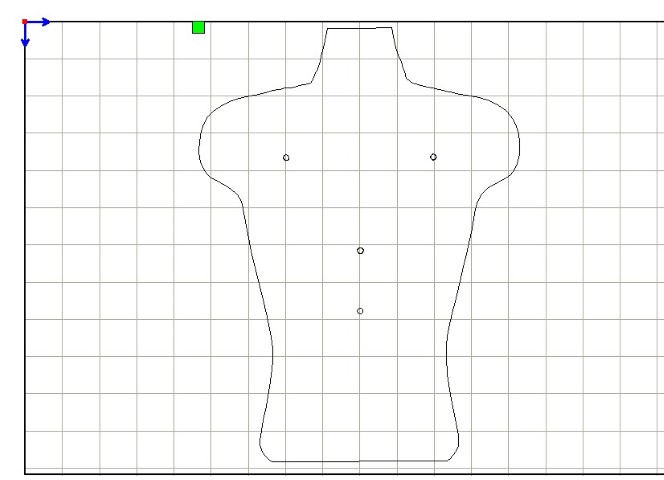
Computer-aided Design
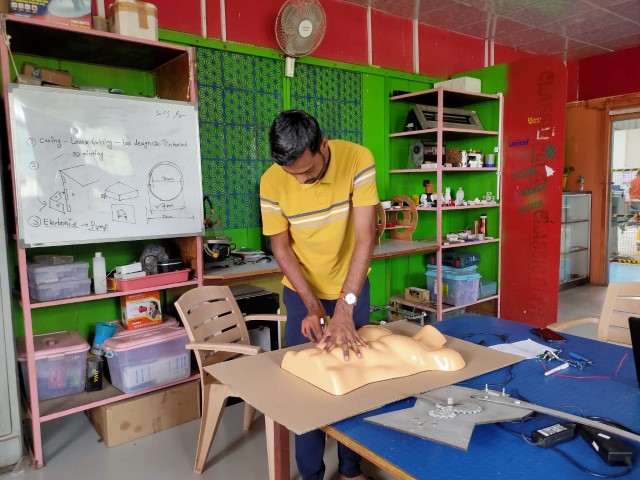
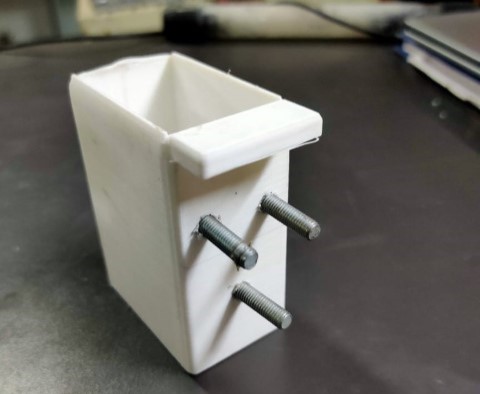
I have designed a Part to hold the Scarecrow bodystructure with the Mounting Stand
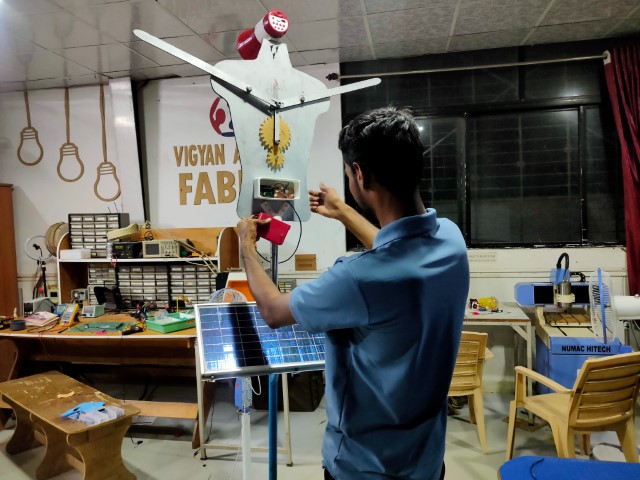
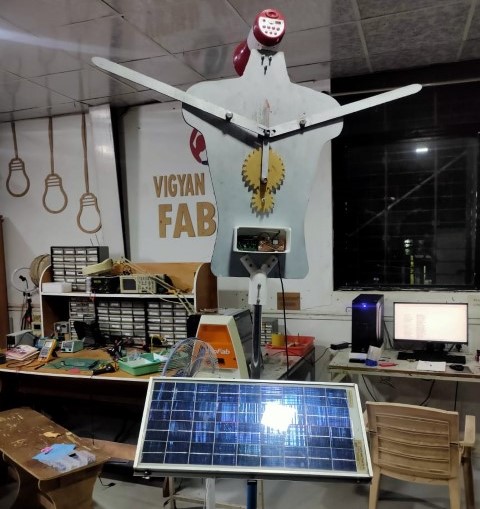
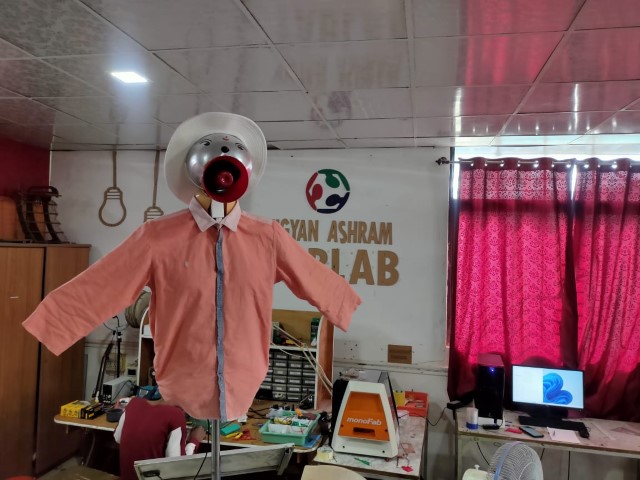
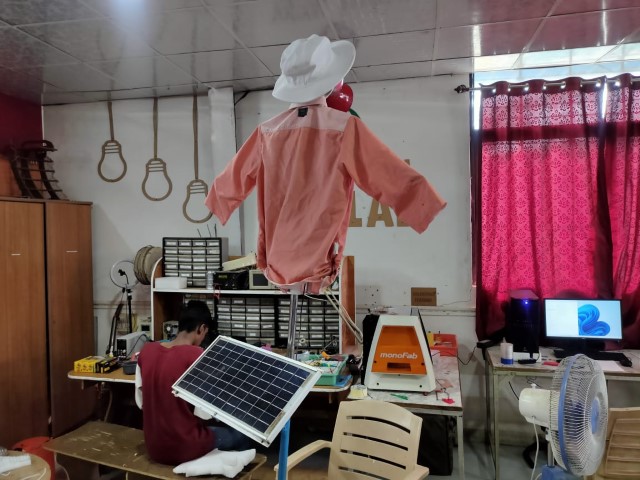
Final Object Ready
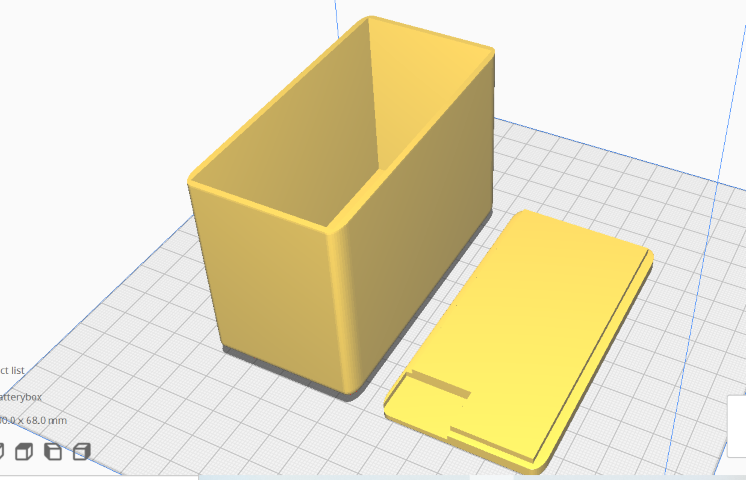
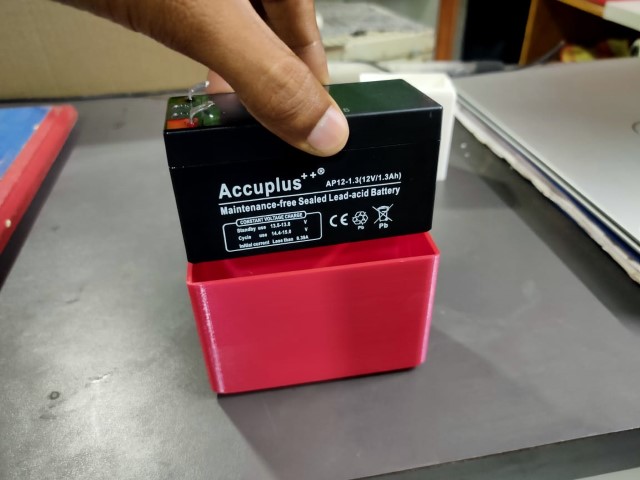
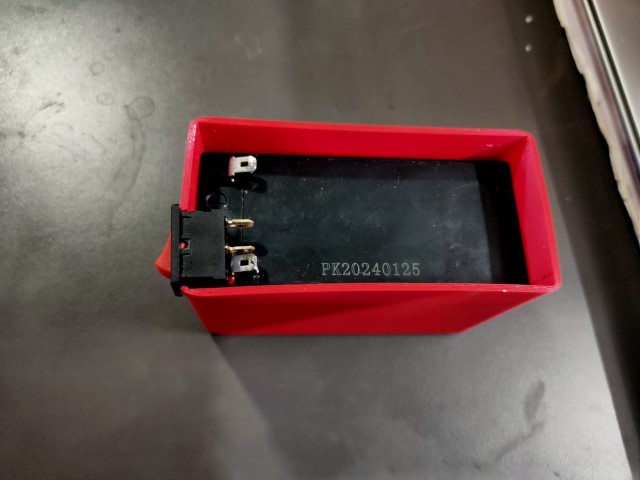
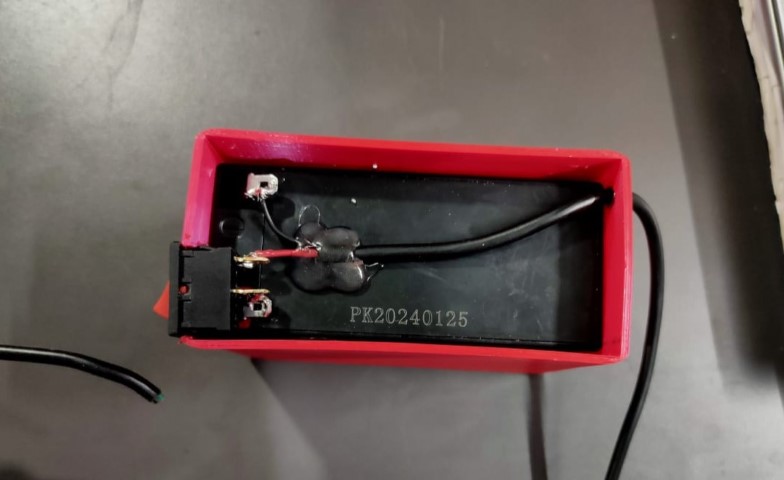
I have also designed the battery case on TinkerCad Software
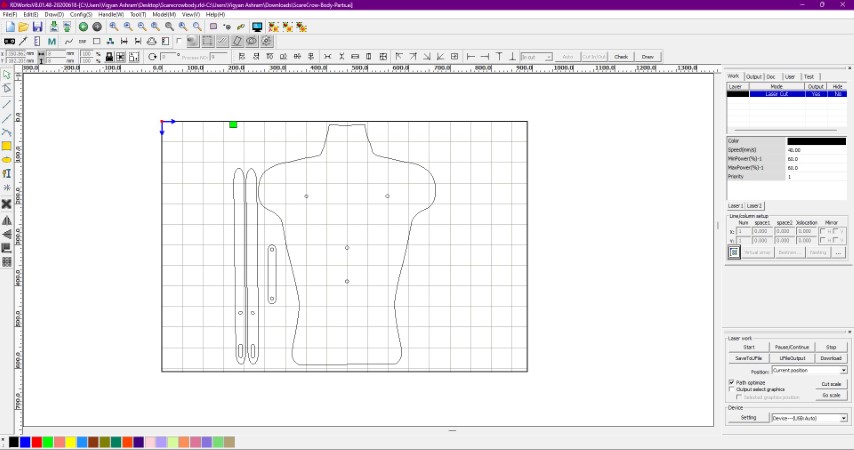
Laser cutting process
To Laser Cut a Body structure which fits exactly into the Manequine Case I have Traced the Footprint of the Part.
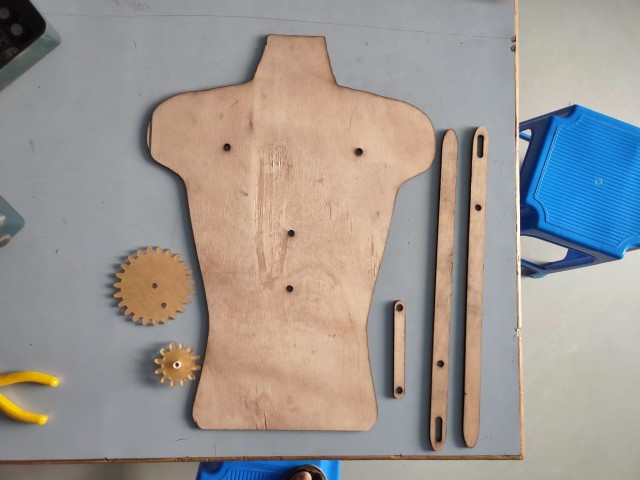
Laser Cutting Parts
I have cut all the parts for making the mechanism
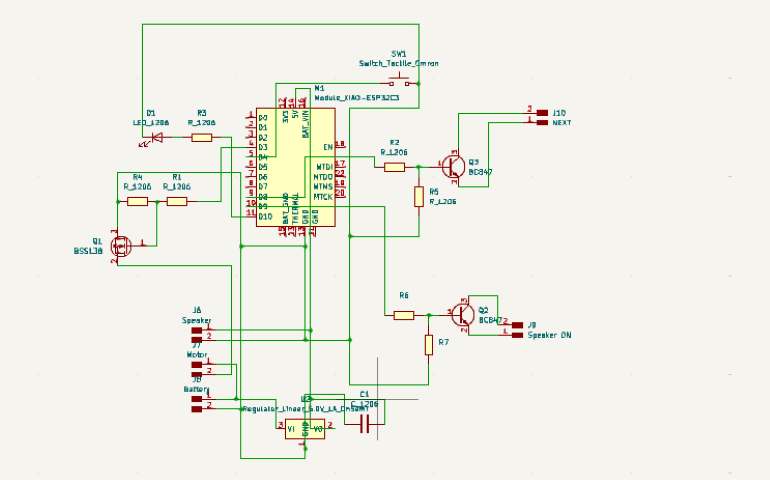
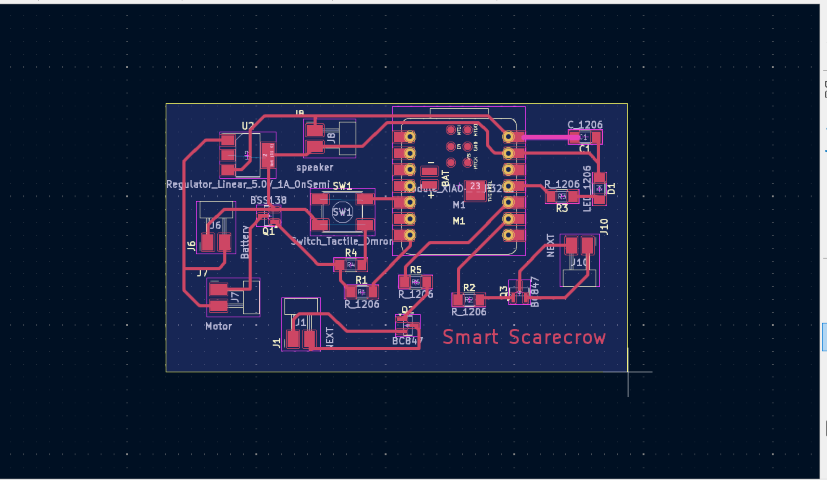
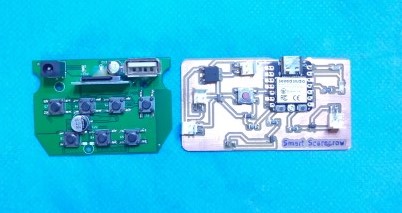
Electronics Design
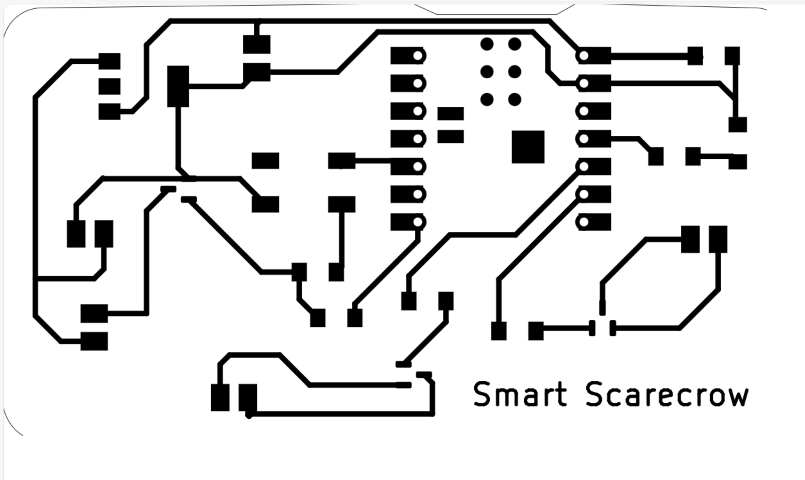
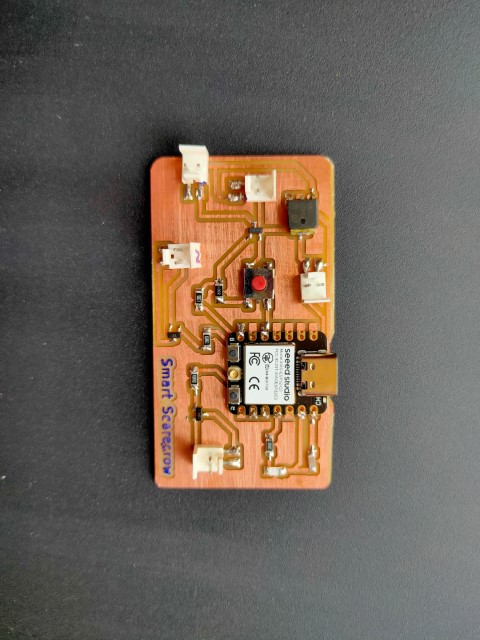
I have made my own Controller Board for Automation of the Scarecrow
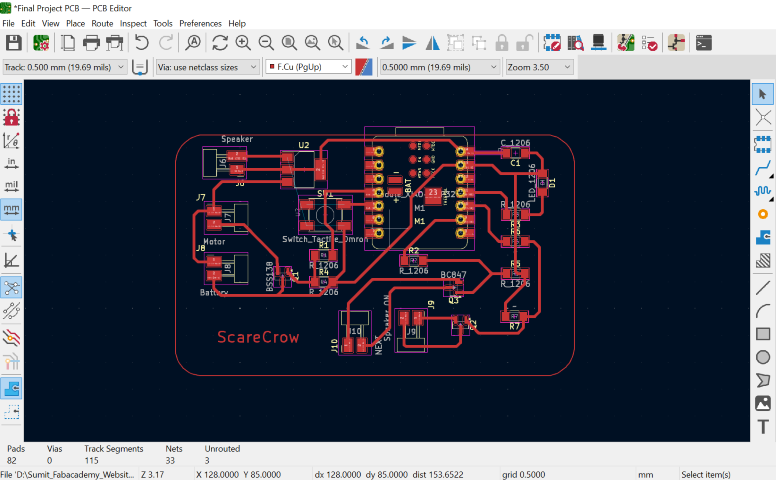
PCB Schematic on KI CAD Software
Routing Connection
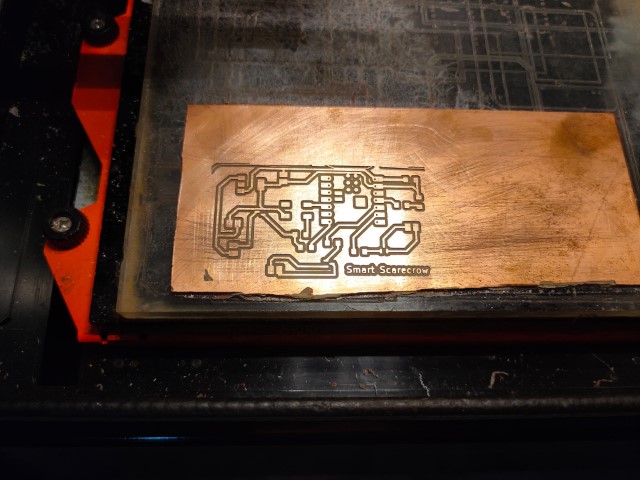
Milling Process
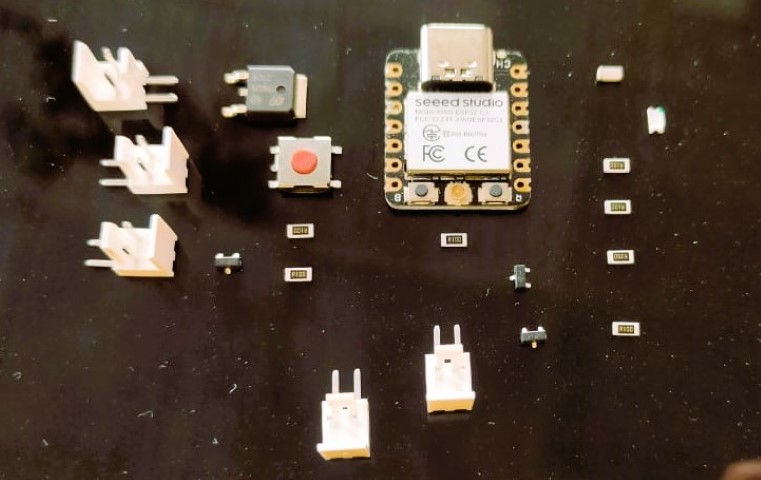
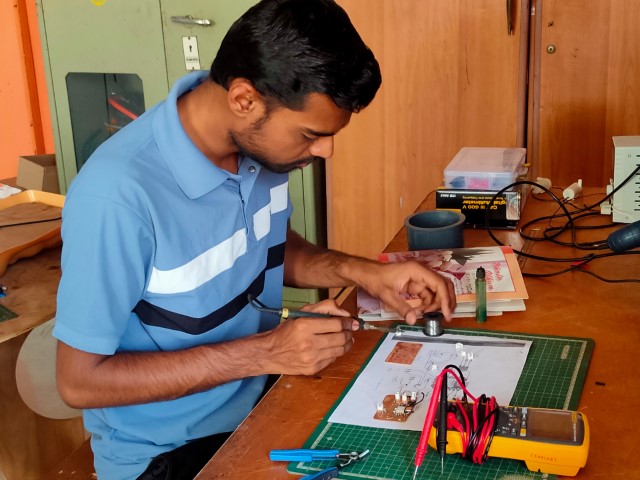
Soldering of the PCB
Testing of Board
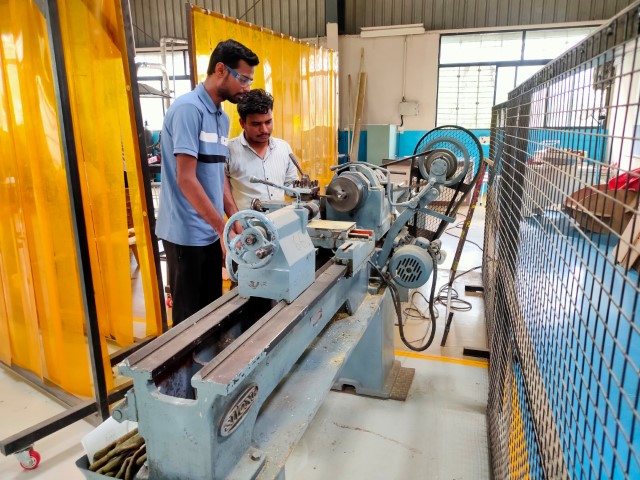
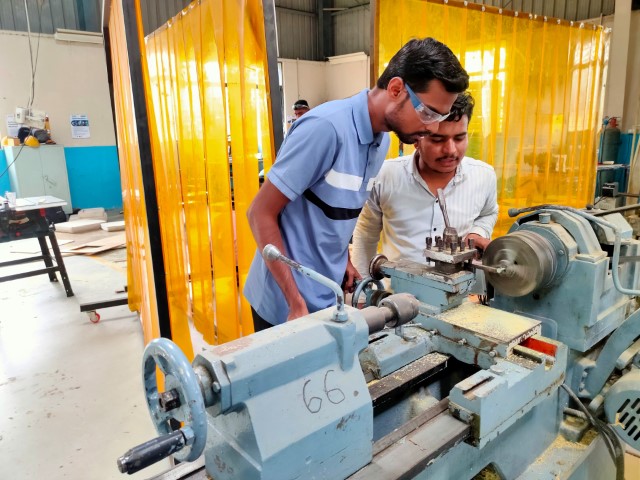
Substractive Lathe operation
Preparation for Assembly
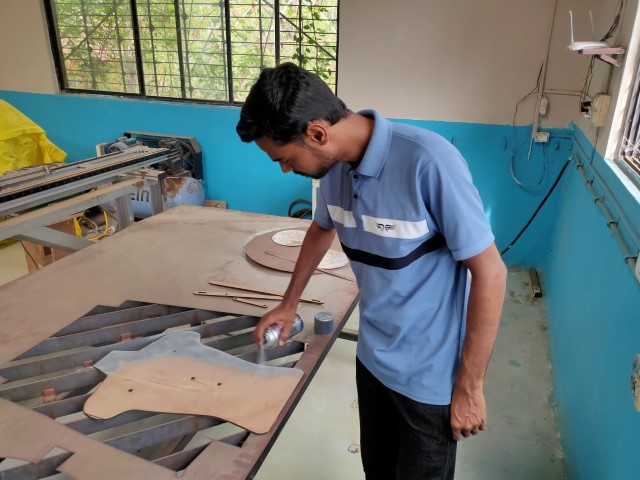
Painting the Laser cutted parts
Taking out the speaker controller to connect with our board
Mounting the Screw on the Speaker Mount
Painting the Laser cutted parts
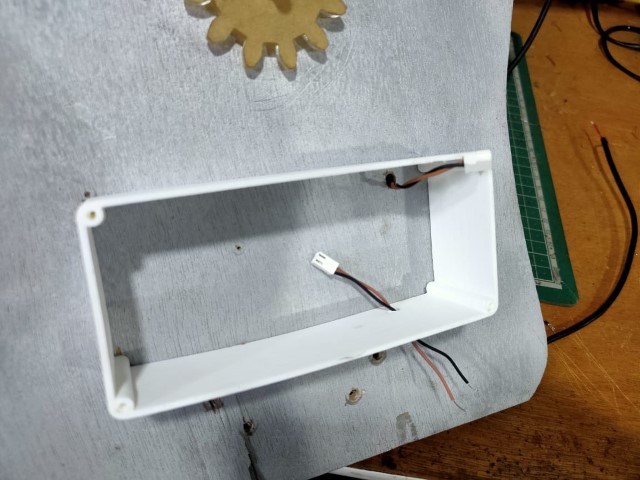
Battery Case Fitting and Switch Connection
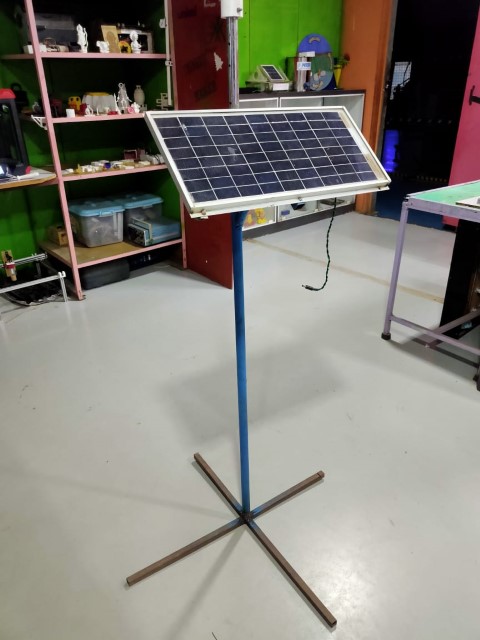
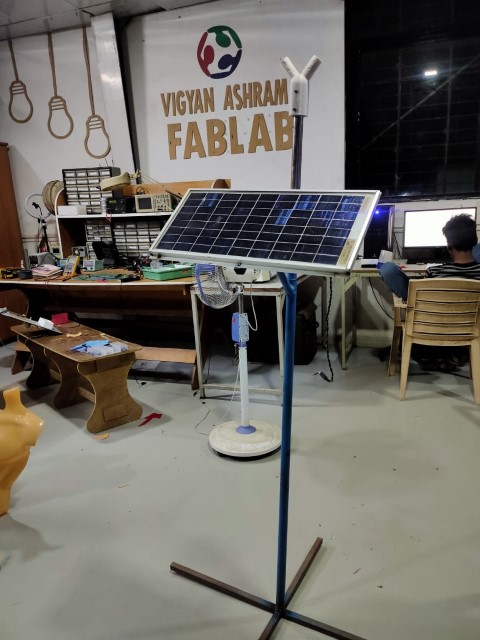
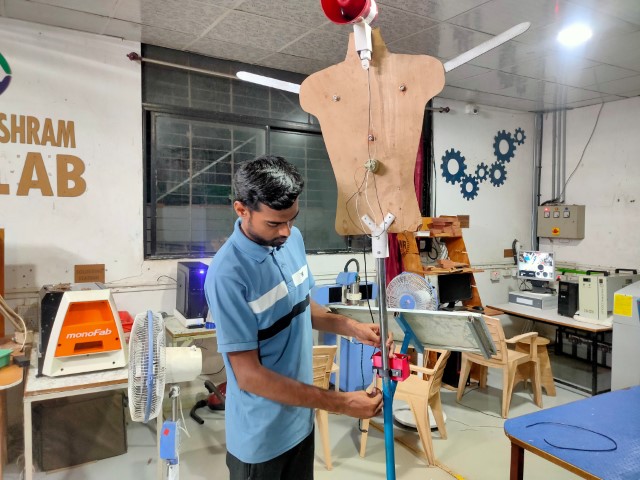
Mounting Stand for ScareCrow
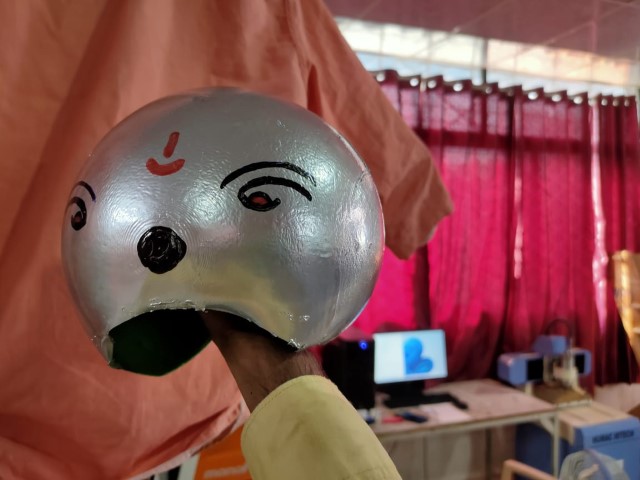
ScareCrow Face
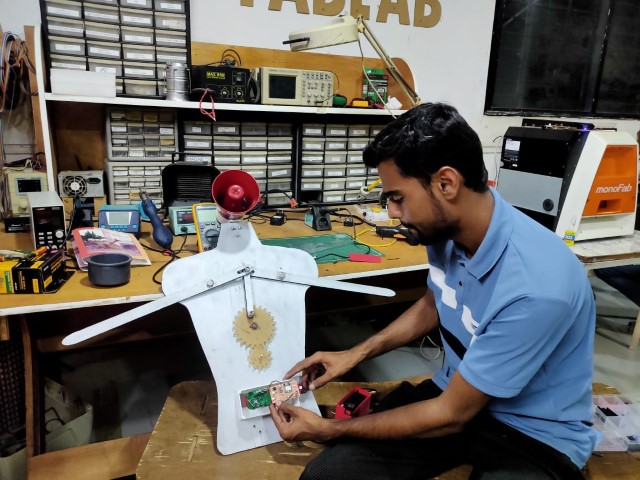
Assembly
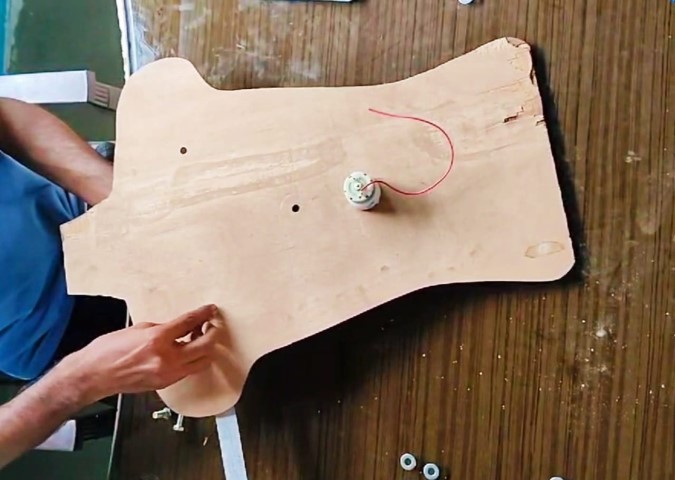
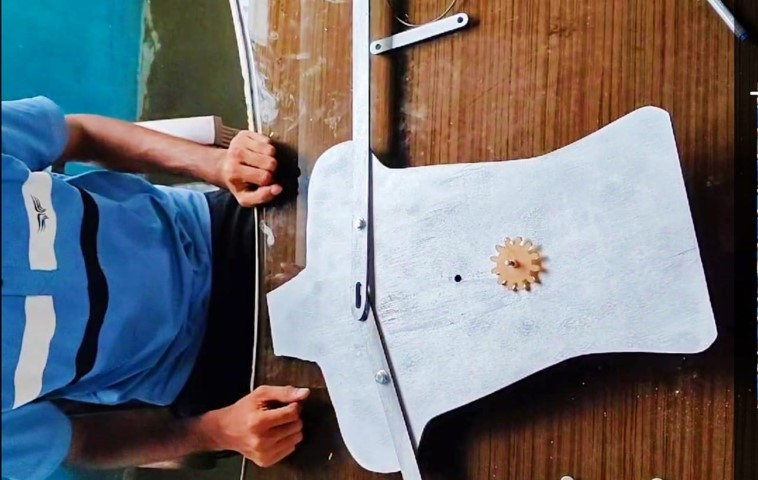
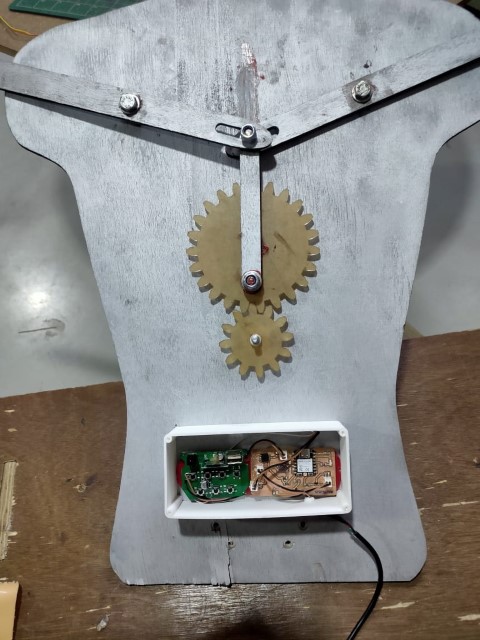
Assemblying the Body mechanism
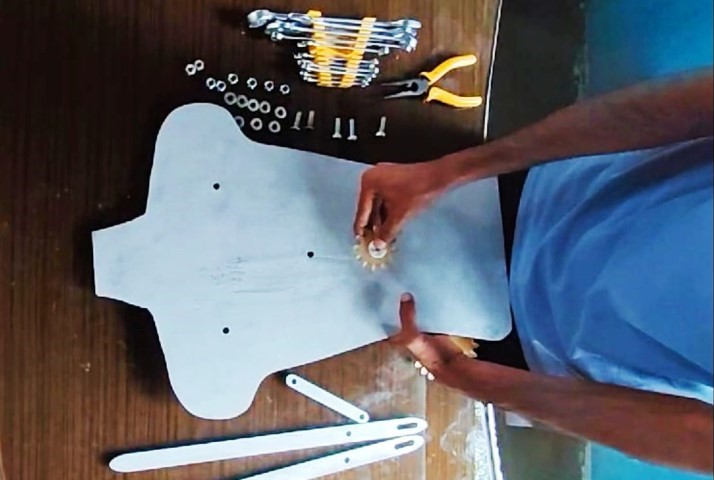
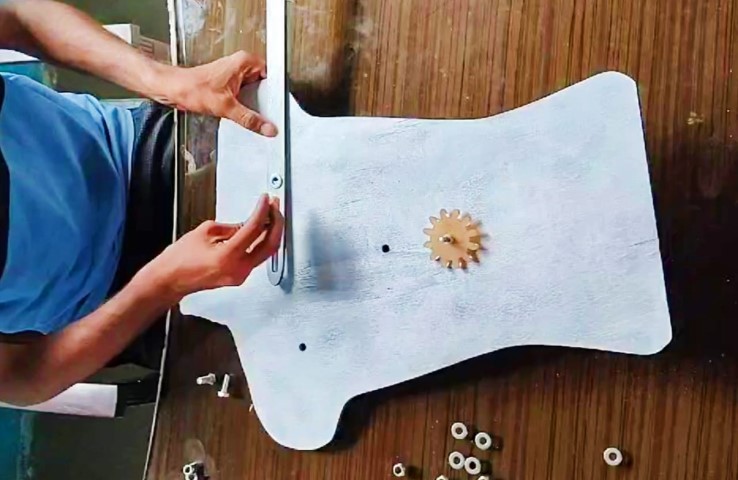
Mount the Driving Gear and Driver Motor
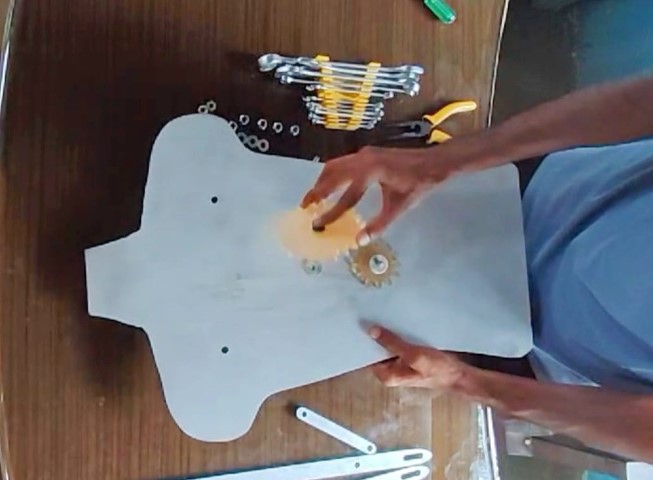
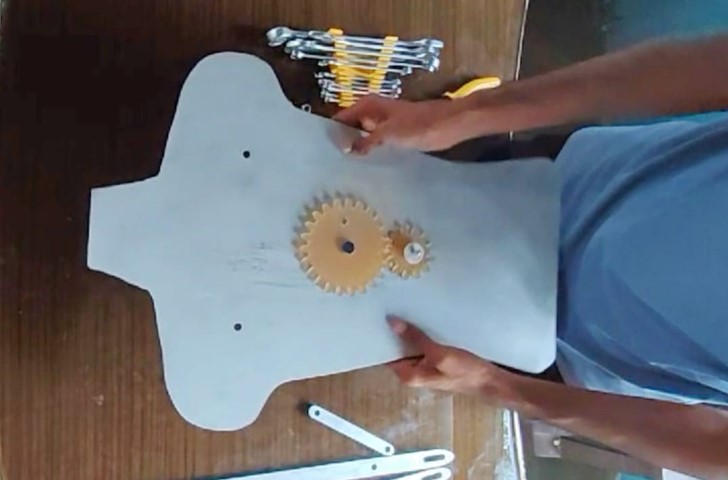
Mount the Driven Gear and Sliding Arm
Mount the Driven Gear and Sliding Arm
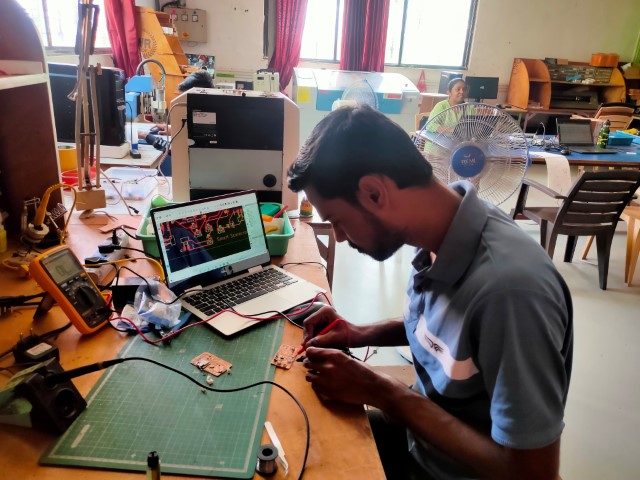
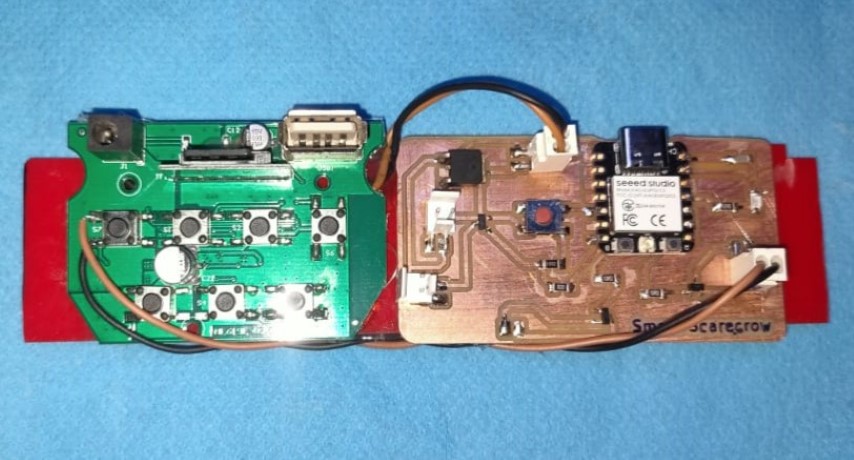
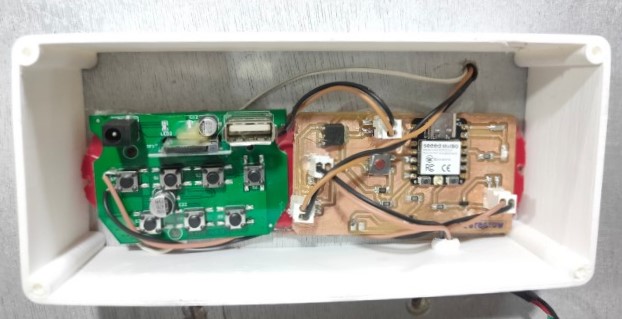
Making the Electronics Connection
Connecting the Micro-Controller Board with the Speaker board
Mounting the Controller Box
Connecting the Connectors of Battery and Speaker with Board
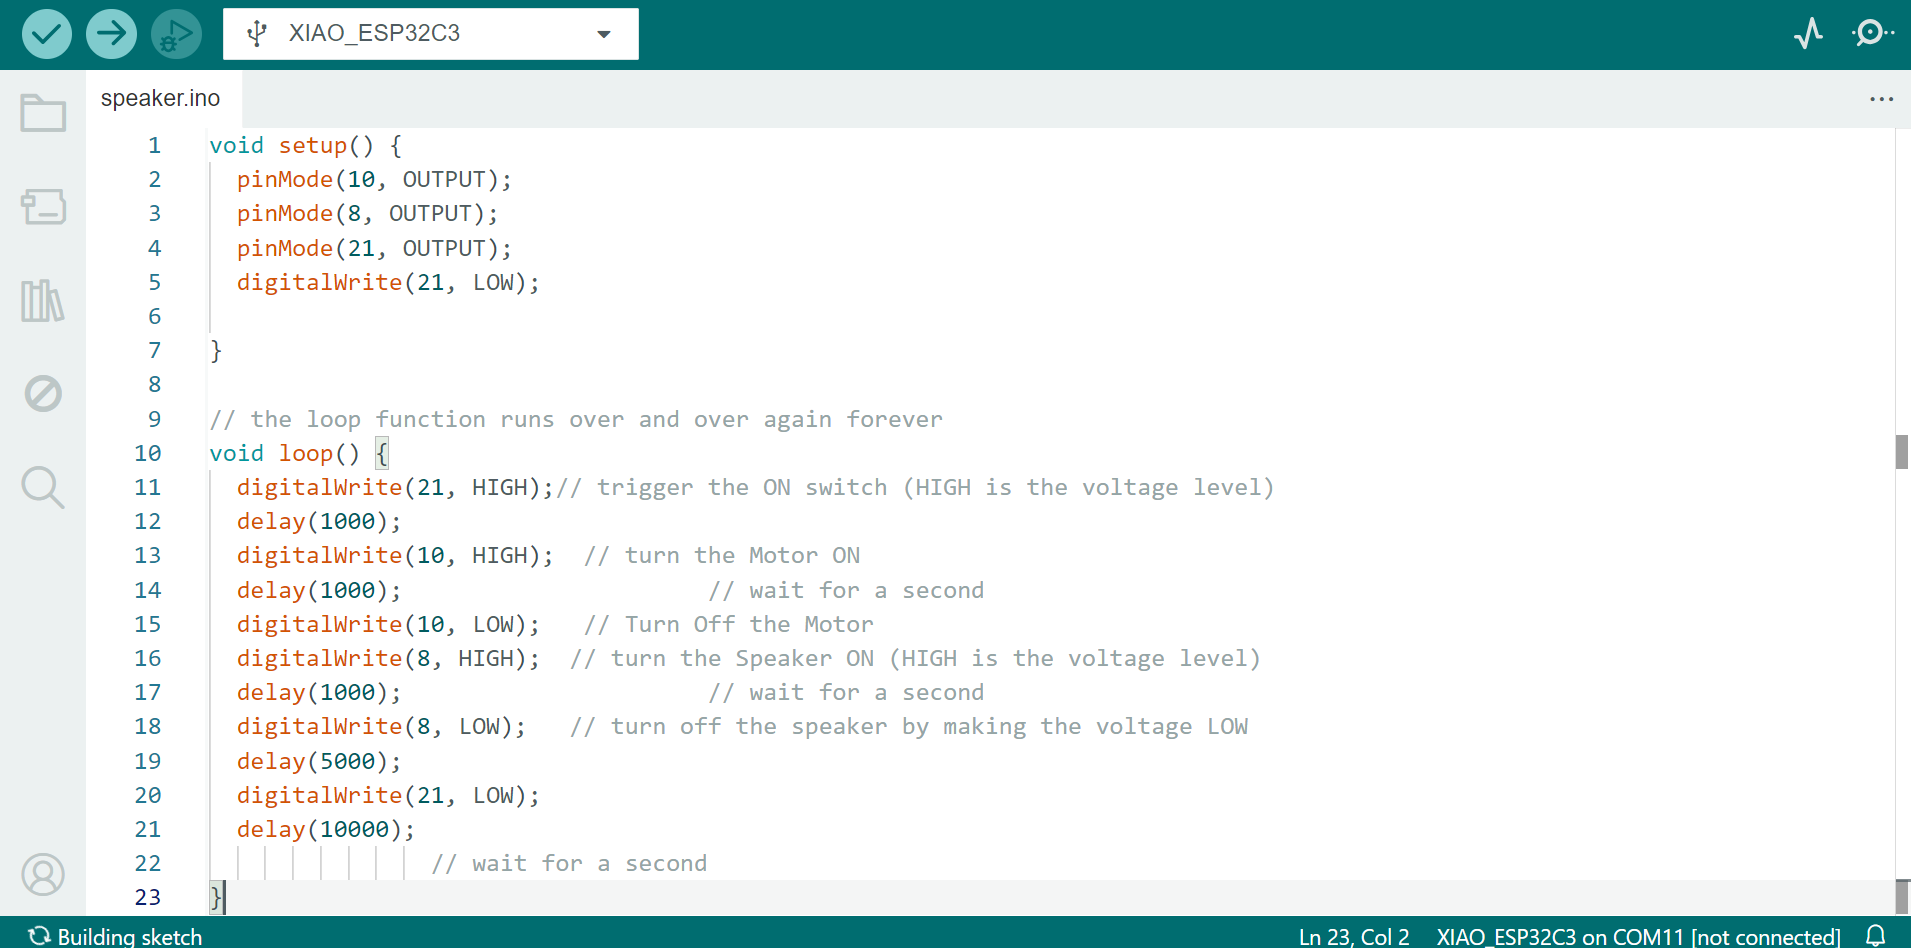
Loading the code
Arduino Code Explanation
void setup()
The setup() function runs once when you press reset or power the board. This is where you initialize the settings.
This journey with FabLab has truly been life-changing for me. Over the past six months, I've had the privilege of acquiring new skills, gaining invaluable experiences, and forging lasting friendships. This transformative journey would not have been possible without the generous support and guidance of several individuals whom I deeply admire and appreciate.
First and foremost, I extend my heartfelt thanks to Prof. Neil Gershenfeld for his unwavering guidance and constant motivation throughout this incredible journey. I am also immensely grateful to Dr. Yogesh Kulkarni, Director of Vigyan Ashram Pabal, whose wise counsel and steadfast support were instrumental in navigating the challenges of FabAcademy.
My sincere appreciation goes out to Mr. Suhas Labade, our dedicated FabLab manager, whose tireless support and mentorship have been invaluable. I am indebted to Ms. Dipali Kamble, my local instructor, for her insightful evaluations and timely guidance, which were crucial to my progress.
I am deeply grateful to my fellow FabAcademy student, Prachi Onkar, whose unwavering support, generous advice, and wonderful camaraderie made every step of this journey more fulfilling. I also extend my heartfelt thanks to Mr. Yogesh Onkar, Prachi's husband, for his encouragement and an worth advice.
Special thanks are due to Mr. Kishor Gaikwad for his guidance on meticulous documentation and to Prasad Patil for his invaluable assistance with CAD designing during Machine Week.
I am also thankful to our FabLab colleagues Priyanka Jadhav, Priyanka Choudhary, Tejswini Chowdhari , Shankar Sai, Soham Kolaki, Tanmay More, Bhushan Rothe, Mahesh Shinde, Akash Lonke, Sumedh Jadhav, Anushkha Shambhudas and Aarti Bhosale , whose collaboration and support enriched this journey in countless ways.
Lastly, I wish to express my heartfelt gratitude to Milliam (Gloabal Instructor) for this fair evaluation and encouraging comments, during a critical phase of my FabAcademy journey, this feedback renewed my motivation and inspired me to persevere despite the challenges I faced.
Each of you has played a vital role in making this experience not only educational but also deeply rewarding on a personal level. Thank you all for being an integral part of my FabAcademy journey.


.jpeg)
.jpeg)

.jpeg)


